
Egg boilers offer a convenient and efficient method for perfectly cooked eggs, differing from traditional stovetop methods. They streamline the process,
reducing cooking time and ensuring consistent results, especially with the Kenji-style steaming technique.
What is an Egg Boiler?
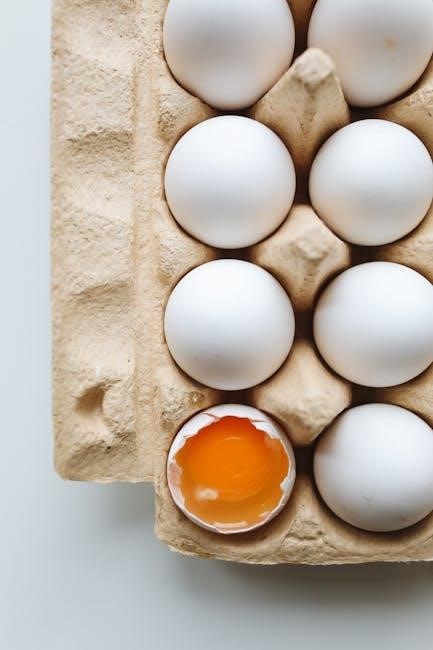
An egg boiler is a small kitchen appliance specifically designed for cooking eggs. Unlike conventional methods involving pots of boiling water, egg boilers utilize steam or precisely controlled heating to cook eggs to your desired doneness. These appliances come in various forms – electric, stovetop, and even microwave versions – offering diverse options for egg preparation.
They typically consist of a heating element, a water reservoir, and an egg holder. Some models, like microwave egg boilers, feature a cup-like structure to hold eggs securely during cooking. The core function remains consistent: to deliver perfectly cooked eggs with minimal effort and consistent results, often employing techniques like the Kenji method.
Benefits of Using an Egg Boiler
Egg boilers provide numerous advantages over traditional cooking methods. They offer speed and efficiency, often cooking eggs faster than stovetop boiling – some models achieving results in minutes. Consistency is another key benefit, eliminating guesswork in achieving desired doneness, whether soft, medium, or hard-boiled.
Furthermore, they conserve energy and water compared to boiling a full pot. Many models are also easy to clean and maintain. Utilizing techniques like the Kenji-style steaming method, egg boilers deliver perfectly cooked eggs with minimal effort, making them a valuable addition to any kitchen.

Types of Egg Boilers
Egg boilers come in three primary forms: electric, stovetop, and microwave. Each utilizes different heating methods to cook eggs, offering varied convenience and control.
Electric Egg Boilers
Electric egg boilers are celebrated for their ease of use and precision. These appliances typically feature a heating element and a measured water reservoir. Users simply add water to the indicated level, place the eggs within, and switch the device on.
They automatically shut off when the desired cooking temperature is reached, eliminating guesswork. Electric models are ideal for consistently achieving soft, medium, or hard-boiled eggs, offering a hands-off approach to egg preparation. They are a popular choice for those seeking convenience and reliability.
Stovetop Egg Boilers
Stovetop egg boilers, often resembling small pots with perforated inserts, offer a traditional approach. Water is added to the pot, brought to a boil, and eggs are carefully placed inside using a spoon. The perforated design ensures even cooking.
Cooking time dictates the doneness, requiring monitoring to prevent over or undercooking. While requiring more attention than electric models, stovetop boilers are affordable and versatile, suitable for various stovetop types, including induction cooktops, though they take approximately 15 minutes.
Microwave Egg Boilers
Microwave egg boilers are typically plastic containers with a vented lid and an internal shelf. Water is added to the base, and eggs are placed securely on the shelf. Careful attention to water levels and microwave power settings is crucial to prevent explosions. These boilers cook eggs quickly, but timing is vital for desired doneness. They are easy to use and clean, offering a convenient option for single-serving egg preparation, holding up to four eggs simultaneously.
Preparing to Boil Eggs
Proper preparation involves selecting the correct egg size and water level, and crucially, piercing the eggshell with an egg pin to prevent cracking during cooking.
Egg Size and Water Level
Determining the correct water level is vital for successful egg boiling, varying based on the desired doneness and egg boiler type. For electric boilers, use the measuring cup provided, filling to the indicated line for soft, medium, or hard-boiled preferences.
Stovetop methods require enough water to fully submerge the eggs.
Microwave boilers also have specific water level markings.
Remember that larger eggs may necessitate slightly more water, while smaller eggs require less, ensuring even cooking throughout. Always consult your egg boiler’s manual for precise guidelines.
Piercing the Eggshell
Piercing the wider end of the eggshell before boiling is a crucial step, preventing cracking during the cooking process. This allows air to escape as the egg heats, reducing pressure buildup. An egg pin is the ideal tool for this, creating a small, neat hole.
Carefully pierce the shell – avoid excessive force. While not always essential, especially with some electric boilers, it’s a recommended practice for consistent results and easier peeling, minimizing frustrating shell fragments.
Using an Egg Pin
An egg pin is a small, specialized tool designed for safely creating a tiny hole in the eggshell. It’s far superior to using a knife or fork, minimizing the risk of cracking the shell prematurely. Hold the egg gently but firmly, and apply light pressure with the pin at the wide end.
The goal is a small puncture, just enough to release air. Using an egg pin contributes to more reliably peeled eggs and reduces the chance of messy explosions during boiling.

Boiling Eggs: Step-by-Step Instructions (Electric)
Electric egg boilers simplify cooking; fill the reservoir, place eggs gently on the tray, switch it on, and monitor for desired doneness—typically around 4-6 minutes.
Filling the Water Reservoir
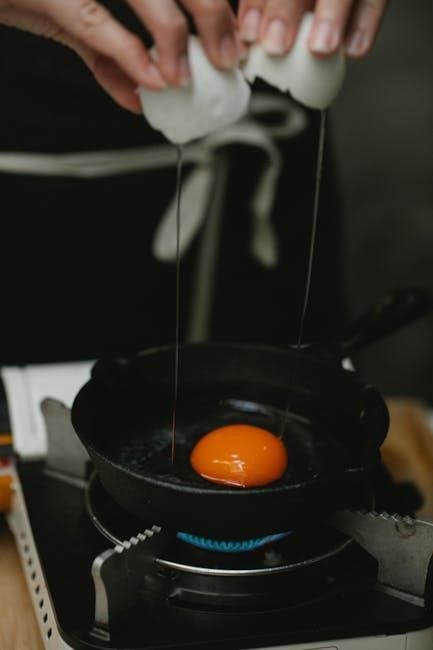
Carefully fill the water reservoir of your electric egg boiler to the appropriate level, indicated by markings for soft, medium, or hard-boiled eggs. These markings ensure the correct amount of steam is generated for your preferred consistency. Using the egg pin to pierce the wide end of the egg before boiling is recommended to prevent cracking. Always use cold water; avoid overfilling, as this can cause water to splash during operation. Precise water levels are crucial for consistent results, mirroring the controlled steaming approach of the Kenji method, where minimal water is used.
Placing the Eggs in the Boiler
Gently place the eggs into the egg boiler, ensuring they sit securely on the provided tray or holder. Avoid overcrowding; follow the manufacturer’s instructions regarding the maximum number of eggs. If using the Kenji-style method, carefully lower the pierced eggs into the boiler with a spoon once the water begins to boil. Proper placement ensures even cooking and prevents cracking. Securely position the lid, ensuring it’s properly sealed to trap the steam and maintain consistent temperature for perfectly cooked eggs.
Switching On and Monitoring
Once the eggs are safely positioned, switch on the electric egg boiler. Monitor the process; some models automatically switch off, while others require manual shutdown. For stovetop methods, maintain a gentle boil. With the Kenji-style approach, set a timer for approximately 4.30 minutes, adjusting slightly based on egg size and desired doneness. Regularly check for any unusual noises or steam leaks, ensuring safe operation throughout the cooking cycle for optimal results.
Boiling Eggs: Step-by-Step Instructions (Stovetop)
Stovetop boiling involves submerging eggs in cold water, bringing it to a boil, and then simmering for the desired time to achieve perfect doneness.
Adding Water to the Pot
Begin by placing your eggs gently into a saucepan. Ensure there’s enough cold water to completely cover them by at least an inch; this promotes even cooking. The amount of water is crucial for consistent results, preventing hot spots and ensuring the eggs cook uniformly.
Using cold water from the start helps to minimize cracking, as a gradual temperature increase is less stressful on the shells. Avoid overcrowding the pot, as this can also lead to uneven cooking and potential breakage.
Bringing Water to a Boil
Place the pot with eggs over medium-high heat. Monitor closely, waiting for a rolling boil – vigorous bubbling that doesn’t stop when stirred. Once boiling, immediately reduce the heat to a gentle simmer. This prevents the eggs from bouncing around and cracking against each other. Maintaining a simmer, rather than a harsh boil, is key for tender eggs.
A gentle simmer ensures even cooking and minimizes the risk of tough, rubbery whites.
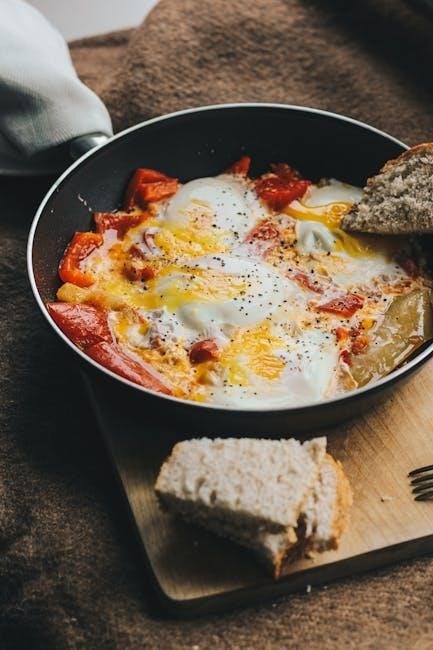
Cooking Time for Different Doneness
For soft-boiled eggs with a runny yolk, simmer for 3-4 minutes. Medium-boiled eggs, featuring a slightly set yolk, require 6-7 minutes of simmering. To achieve fully hard-boiled eggs with a firm yolk, continue simmering for 8-10 minutes. These times are guidelines; egg size and stovetop variations impact results. Experimenting with 30-second increments helps dial in your perfect doneness. Remember to immediately cool the eggs post-boiling to halt the cooking process.
Boiling Eggs: Step-by-Step Instructions (Microwave)
Microwave egg boilers require minimal water—just enough to cover the eggs’ base. Use medium power settings and carefully monitor cooking times to prevent explosions.
Water Level for Microwave Boiling
Determining the correct water level is crucial when using a microwave egg boiler. Unlike traditional boiling, the goal isn’t full submersion. Instead, add just enough cold water to the cooker to reach the designated fill line, or approximately one inch deep, covering the base but not the eggs themselves.
This method utilizes steam to cook the eggs, preventing cracking and ensuring even doneness. Insufficient water can lead to uneven cooking or even damage to the microwave. Always refer to the specific instructions accompanying your microwave egg boiler, as water level requirements can vary slightly between models.
Microwave Power Settings
Selecting the appropriate microwave power setting is vital for successful egg cooking. Generally, using medium-high power (around 70-80%) is recommended. Avoid using full power, as this can cause the eggs to explode due to rapid steam buildup. Lower power settings may extend cooking time excessively.
Experimentation might be needed based on your microwave’s wattage. Start with a recommended time and adjust slightly for future batches. Consistent power levels ensure predictable results, yielding perfectly cooked eggs every time. Always consult your egg boiler’s instructions for specific power recommendations.
Cooking Time for Microwave Eggs
Determining the correct cooking time depends on your desired doneness and microwave wattage. For soft-boiled eggs, start with 3-4 minutes for one egg, increasing by 30 seconds for each additional egg. Medium-boiled eggs typically require 5-6 minutes, while hard-boiled eggs need 7-8 minutes.
These are starting points; adjust based on your microwave and egg size. Monitor closely to prevent overcooking. Remember to pierce the yolk before microwaving to avoid explosions; Consistent timing yields predictable results, ensuring perfectly cooked eggs.
Achieving Desired Doneness
Precise timing is crucial for soft, medium, or hard-boiled eggs. Adjust cooking durations by 30-second increments to personalize results, based on egg size and preference.
Soft Boiled Eggs ⎯ Timing
Achieving a perfectly runny yolk for soft-boiled eggs requires careful attention to timing. Utilizing the Kenji-style method, steaming eggs for approximately 4 minutes and 30 seconds generally yields excellent results. However, egg size significantly impacts cooking time; larger eggs may necessitate an additional 30 seconds.
For electric boilers, consult the manufacturer’s guidelines, as water level indicators often correlate with desired doneness. Remember to immediately submerge cooked eggs in an ice bath to halt the cooking process and prevent overcooking, preserving that desirable soft center.
Medium Boiled Eggs ― Timing
For eggs with a slightly set yolk, but still possessing some creaminess, a medium boil is ideal. Employing the Kenji method, increase the steaming time to around 6 minutes. Adjustments are crucial; larger eggs might require an extra minute to reach the desired consistency.
Electric egg boilers often feature markings for medium doneness – utilize these as a starting point. Following cooking, an immediate ice bath is vital to prevent further cooking and maintain the partially set yolk’s texture, offering a delightful balance.
Hard Boiled Eggs ― Timing
Achieving fully cooked, firm yolks requires precise timing. Utilizing the Kenji-style steaming technique, aim for approximately 8-9 minutes. Remember, egg size impacts cooking duration; larger eggs necessitate a slightly longer steaming period. Electric boilers typically have a ‘hard-boiled’ setting – a reliable starting point.
Post-cooking, immediately submerge the eggs in an ice bath. This halts the cooking process, preventing a greenish ring around the yolk and simplifying peeling. Consistent results depend on precise timing and rapid cooling.

Cooling and Peeling Eggs
Rapid cooling in an ice bath is crucial for easy peeling and prevents overcooking. Gently tap the egg all over, then roll it before peeling under cool water.
Ice Bath Method
Immediately transferring boiled eggs to an ice bath is paramount for several reasons. This rapid cooling halts the cooking process, preventing the yolks from developing a green ring and ensuring the desired doneness is maintained. More importantly, the shock of cold water causes the egg to contract slightly, separating it from the shell membrane.
This makes peeling significantly easier, reducing frustration and minimizing egg white damage. Prepare a bowl filled with ice and cold water before the eggs finish cooking. Once boiled, gently lower the eggs into the ice bath and let them sit for at least 10-15 minutes for optimal results.
Peeling Techniques
After the ice bath, gently tap the egg all over on a hard surface to create a network of fine cracks. Begin peeling from the larger end, where an air pocket usually exists. Roll the egg gently under cool running water as you peel, allowing the water to seep under the shell and aid in separation.
If stubborn shell pieces remain, continue rolling and use the water’s pressure. Fresh eggs can be more challenging to peel; slightly older eggs generally peel more easily due to pH changes within the egg white.
Troubleshooting Common Issues
Cracked eggs during boiling often result from rapid temperature changes or existing shell weaknesses. Difficult peeling can stem from very fresh eggs or insufficient cooling.
Eggs Cracking During Boiling
Eggshell cracking is a common frustration when boiling eggs, but several factors contribute to this issue. Rapid temperature fluctuations – placing cold eggs directly into boiling water – are a primary cause. A small crack already present in the shell, often unseen, can quickly expand with the heat.
To minimize cracking, gently lower eggs into the water using a spoon, or start with lukewarm water. Piercing the wider end of the egg with an egg pin releases internal pressure, reducing the likelihood of cracks. Remember, even with precautions, occasional cracking is normal and doesn’t necessarily affect edibility.
Difficult to Peel Eggs
Struggling to peel hard-boiled eggs is a widespread problem, often linked to egg freshness. Very fresh eggs have a lower pH, causing the white to adhere strongly to the shell membrane. Cooling eggs rapidly in an ice bath immediately after boiling creates a gap between the egg and the shell, aiding peeling.
Gently tap the egg all over, then roll it on a hard surface to create numerous cracks before peeling under cool running water. Adding a teaspoon of baking soda to the boiling water can also increase the pH, making peeling easier.

Egg Boiler Safety Precautions
Always prioritize safety when using an egg boiler; ensure electrical components remain dry and handle hot surfaces with care to prevent burns.
Electrical Safety
When operating electric egg boilers, always ensure the power cord is undamaged and not exposed to water. Never immerse the boiler base in water or any other liquid to prevent electric shock. Before cleaning, unplug the appliance and allow it to cool completely. Avoid using extension cords if possible; if necessary, use a heavy-duty extension cord rated for the appliance’s wattage. Regularly inspect the cord for fraying or damage, and discontinue use if any issues are detected; Do not operate the boiler with wet hands.
Handling Hot Surfaces
Electric and stovetop egg boilers generate significant heat during operation. Always use oven mitts or pot holders when handling the boiler, lid, or eggs immediately after cooking. Avoid touching the heating element or interior surfaces until they have cooled down completely. Be cautious of steam escaping during or after the boiling process, as it can cause burns. Place the boiler on a stable, heat-resistant surface away from flammable materials. Supervise children closely when the appliance is in use to prevent accidental contact with hot surfaces.
Cleaning and Maintenance
Regular cleaning ensures longevity and hygiene. Unplug before cleaning; wash removable parts with soap and water. Wipe the exterior with a damp cloth, avoiding abrasive cleaners.
Cleaning Electric Egg Boilers
Before cleaning, always ensure the electric egg boiler is unplugged and completely cool to prevent burns or electrical shock. Most models feature removable parts, such as the egg tray and water reservoir, which can be washed with warm, soapy water. Avoid using abrasive cleaners or scouring pads, as these can damage the surface.
The heating element should be wiped down with a damp cloth only; never immerse the base unit in water. Thoroughly dry all components before reassembling. Regular cleaning prevents mineral buildup and ensures optimal performance, extending the lifespan of your appliance. Inspect the power cord for any damage before each use.
Cleaning Stovetop Egg Boilers
Cleaning a stovetop egg boiler is generally straightforward. After cooling completely, remove any remaining egg residue with warm, soapy water and a non-abrasive sponge. For stubborn stains, a paste of baking soda and water can be effective. Ensure all parts are thoroughly rinsed to remove any soap residue;
Pay close attention to the perforations in the boiler, ensuring they are clear of obstructions. Dry all components completely before storing to prevent rust. Avoid using harsh chemicals, as they may affect the metal’s integrity. Regular cleaning maintains hygiene and prolongs the boiler’s life.
Kenji-Style Egg Boiling Method
Kenji-style boiling utilizes steaming with minimal water, around 4.30 minutes, for optimal results. Gently place eggs into boiling water, then immediately cool them.
Steaming vs. Boiling
Traditional boiling often leads to overcooked yolks and a rubbery texture, while Kenji-style steaming offers superior control. This method uses a small amount of water, creating a gentle, even heat.
Steaming minimizes cracking and results in tender, perfectly cooked eggs with creamy yolks. The reduced water contact prevents the egg white from becoming tough.
It’s a nuanced approach, prioritizing texture and flavor over simply submerging eggs in rapidly boiling water, offering a consistently excellent outcome.
Optimal Cooking Time (Kenji Method)
For Kenji’s steaming method, begin with boiling a small amount of water in a pan. Gently add eggs using a spoon and immediately start a timer.
4 minutes and 30 seconds yields a perfectly cooked egg with a set white and a runny yolk. Adjusting by 30 seconds allows for customization – less for softer, more for firmer.
This precise timing, combined with the steaming process, consistently delivers exceptional results, surpassing traditional boiling techniques in both texture and flavor.

Instagram Issues and Egg Boilers (Relevance)
Recent Instagram disruptions highlight the unreliability of online information; verifying egg boiler instructions from multiple, trusted sources is crucial for successful cooking.
Instagram Account Problems (Brief Mention)
Numerous users are currently experiencing issues with their Instagram accounts, ranging from disabled advertising accounts to complete access loss. These widespread problems demonstrate a concerning lack of platform stability and reliability. Consequently, relying solely on Instagram for cooking guidance, including egg boiler instructions, is ill-advised.
Information found on the platform may be outdated, inaccurate, or simply unavailable due to account restrictions. Always cross-reference instructions with reputable sources, like manufacturer guides or established cooking websites, to ensure safe and successful egg preparation.
Reliability of Online Information
The internet’s vastness presents a challenge when seeking reliable egg boiler instructions. Recent Instagram disruptions highlight the potential for misinformation and inaccessible guidance. While platforms offer quick access, verifying information is crucial. User-generated content, even with video demonstrations like the Kenji-style method, can vary in accuracy. Always prioritize official manufacturer guidelines and established cooking resources. Cross-referencing multiple sources ensures safe operation and optimal results, mitigating risks associated with potentially flawed online advice.